|
|
Post by Cthulhu_gump on Dec 4, 2008 19:10:28 GMT 10
Ok, Ive been doing some conversion work for the upcoming Undecided Chaos army that I'm making. With the release of the infantry and the grand master Dobbsy's help Ive been able to put together a good infantry base (which we'll get to in later pics). But for starters heres the Banelord: 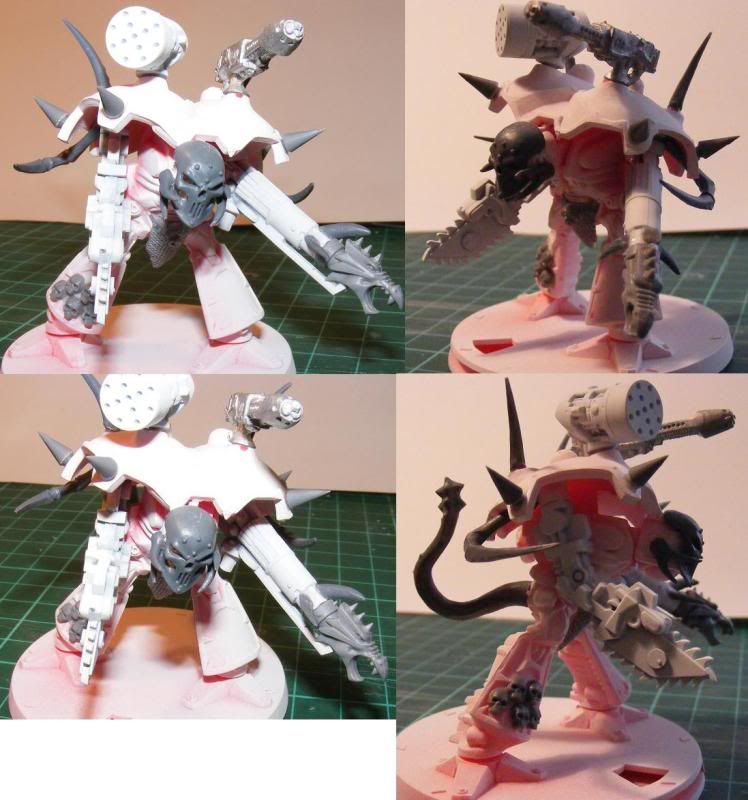 And the Land raiders and Rhinos, which have just been started to try to get me to get the feel for what else is needed to finish them off: 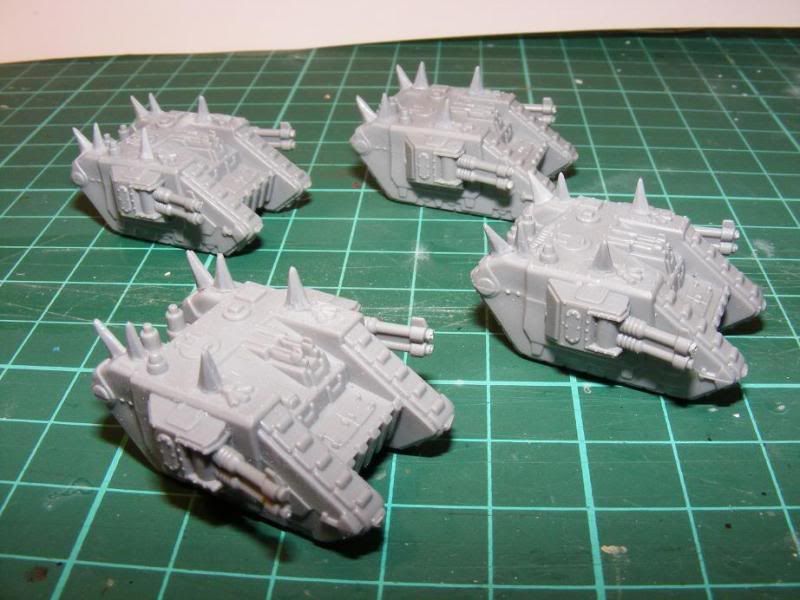 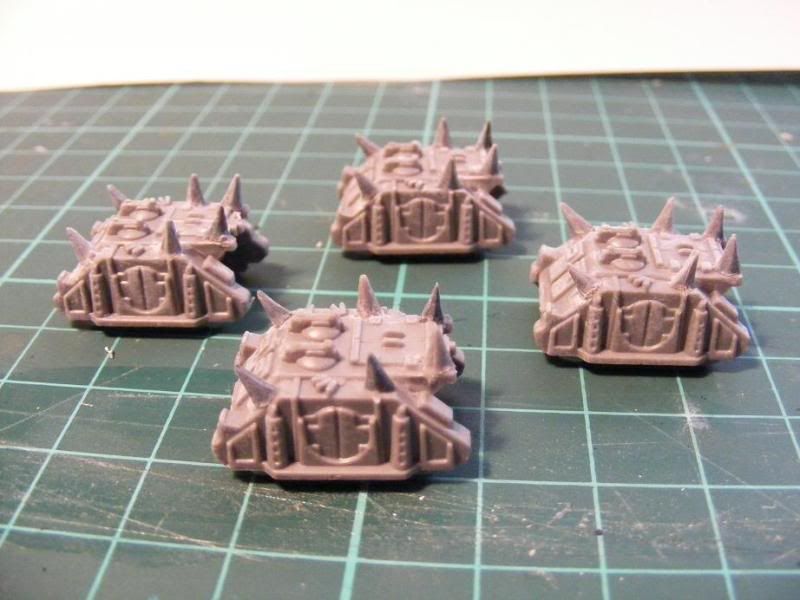 Please forgive the over exposed nature of the pics, its my wife's camera and I hate it with a passion! |
|
Snap
Full Member
 Why?
Why?
Posts: 122
|
Post by Snap on Dec 4, 2008 23:54:45 GMT 10
There's some serious Chaos awesomeness Brother Gump...
The left arm of the Banelord looks a little long, but it's probably just the angle of the shot. Any thoughts of adding a banner?
Nurglicious - all the way...
|
|
|
|
Post by Cthulhu_gump on Dec 18, 2008 11:01:40 GMT 10
After a slight loss of time due to having to go to work... Im back into it again. Heres the next set of pics of the titan: 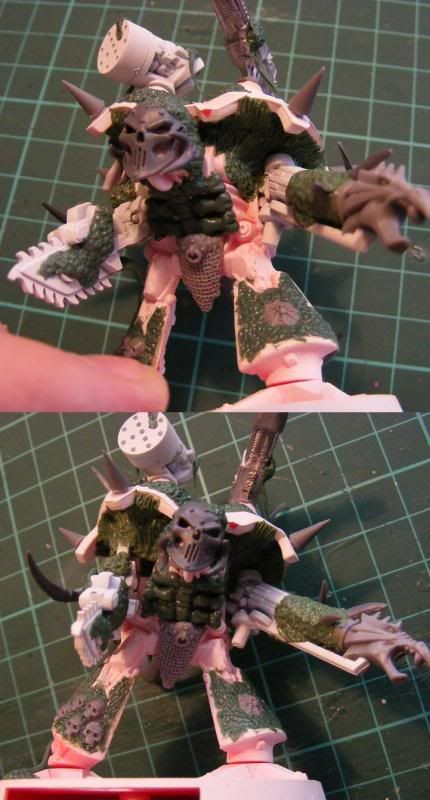 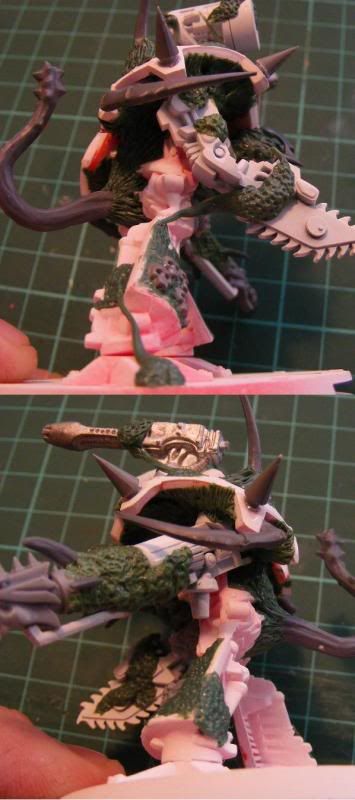 |
|
|
|
Post by daemonprince on Dec 18, 2008 14:44:52 GMT 10
Firstly, C-g, let me say I fell off my chair laughing at "Chaos Undecided".
Secondly, I love all the spikes on the vehicles. Its amazing how 'chaosy' it makes them look. Are these home-carved from sprue or something or, if not, where are they from?
As all chaos players know, you can't have too many spikes!
|
|
|
|
Post by cal001 on Dec 18, 2008 19:47:12 GMT 10
Way cool brother, way way cool.
Aaron
|
|
|
|
Post by Cthulhu_gump on Dec 20, 2008 11:34:31 GMT 10
Thanks guys, Im thinking that that will be all that will be done with this dude, I dont want o make him too crowded... Ahh, maybe a few more spikes  The spikes are actually from the spikey bits sprues from the 40K Vehicles, cut them off at the right length and then just glue em on! |
|
|
|
Post by gr00v3r on Dec 20, 2008 16:35:10 GMT 10
Mind compiling all these posts (images plus descriptions of the steps) into a single document for me? I'll edit it for you and we can pop it up on BoLS.  |
|
|
|
Post by marklogue on Jan 4, 2009 23:25:37 GMT 10
You GS work is highly impressive!
|
|
|
|
Post by onyx on Jan 5, 2009 20:19:27 GMT 10
Lovely work Drew.
Really looking forward to seing these after your excellent painting skills have finished them!
|
|
|
|
Post by andythompson on Jan 5, 2009 22:12:06 GMT 10
G'day Drew.
What did you use for the head of the titan, it looks excellent.
Andy
|
|
|
|
Post by Cthulhu_gump on Jan 6, 2009 10:12:08 GMT 10
Its one of the 40K defiler heads, the next one will be going on the Imperator someday after the wahounds are finished.
Hopefully there will be some Warhound pics up today!
|
|
|
|
Post by Cthulhu_gump on Jan 6, 2009 13:11:10 GMT 10
Ok the Banelord has pretty much been completed with the last set of pics, I finished off the base and have got a couple of pics here: 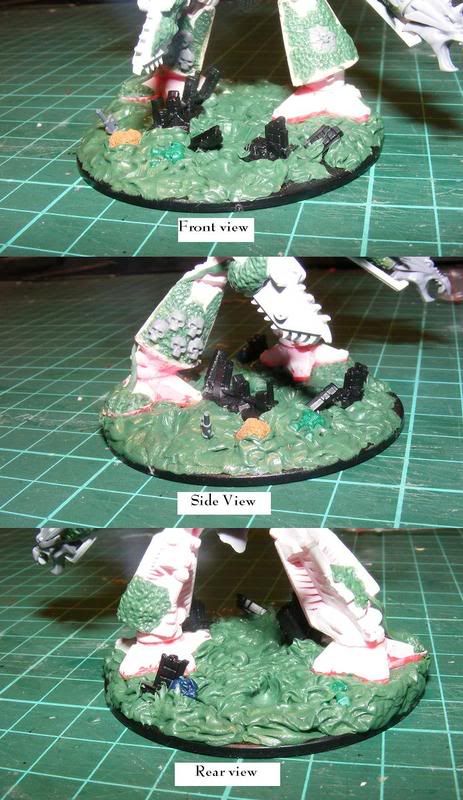 |
|
|
|
Post by Cthulhu_gump on Jan 6, 2009 13:14:48 GMT 10
• The next job for the Chaos is the conversion of the 3 Warounds that I had spare. As always I start by fixing all the plastic bits onto the metal body, I wanted each WH to look different and so tried to go with a different form of spikes down the back of them and different heads. Warhound 1 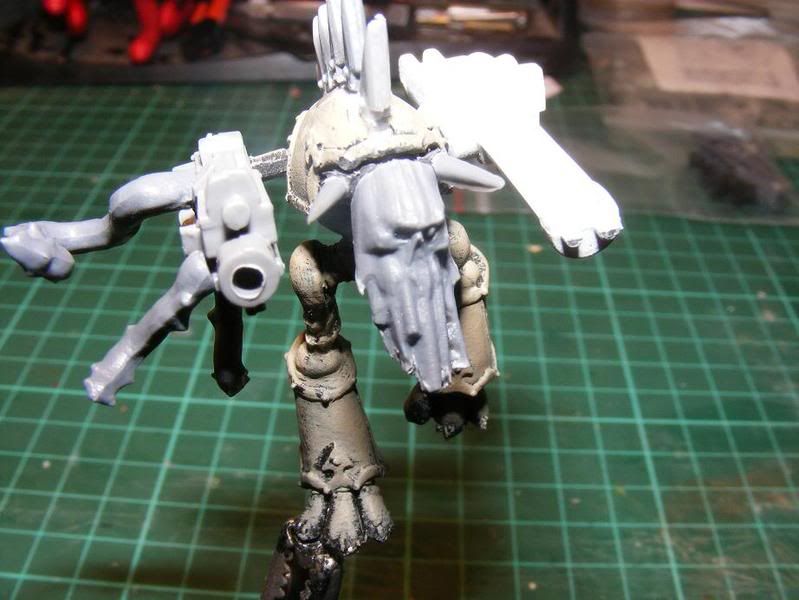  Warhound 2 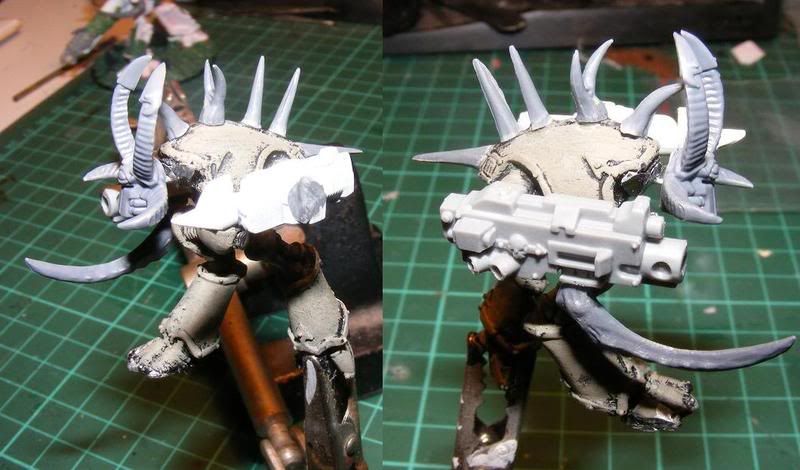 Warhound 3 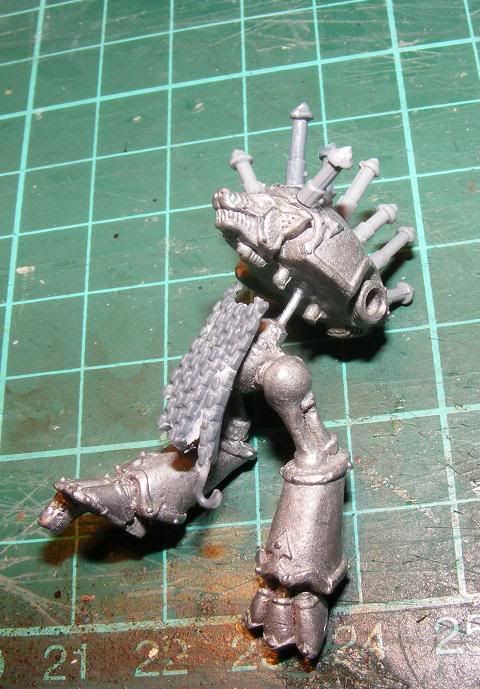  I didnt have any other weapons so I decided to make one out of bits (seen here on the left) |
|
|
|
Post by Cthulhu_gump on Jan 6, 2009 13:15:38 GMT 10
• The next step was to begin the green stuff work, which I am really beginning to enjoy as the figures in the army continue to take on their own personalities. Heres step 2: Warhound 1 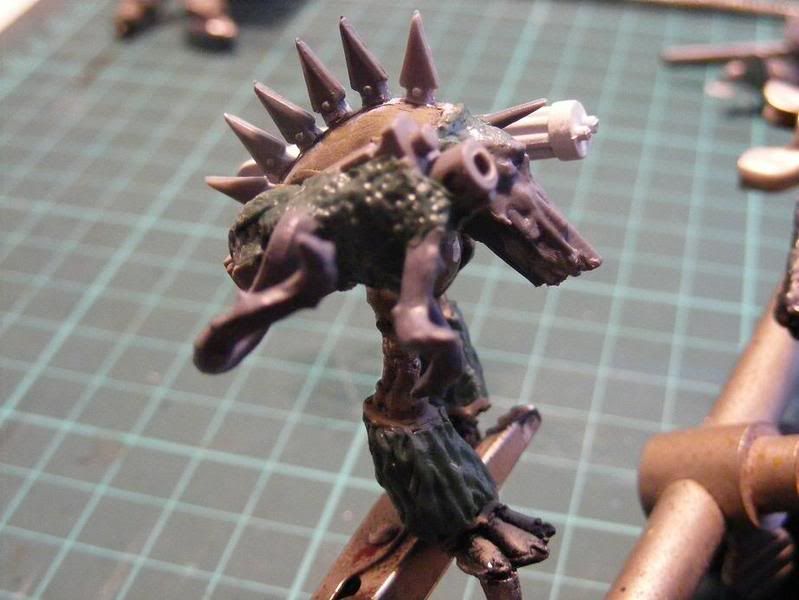 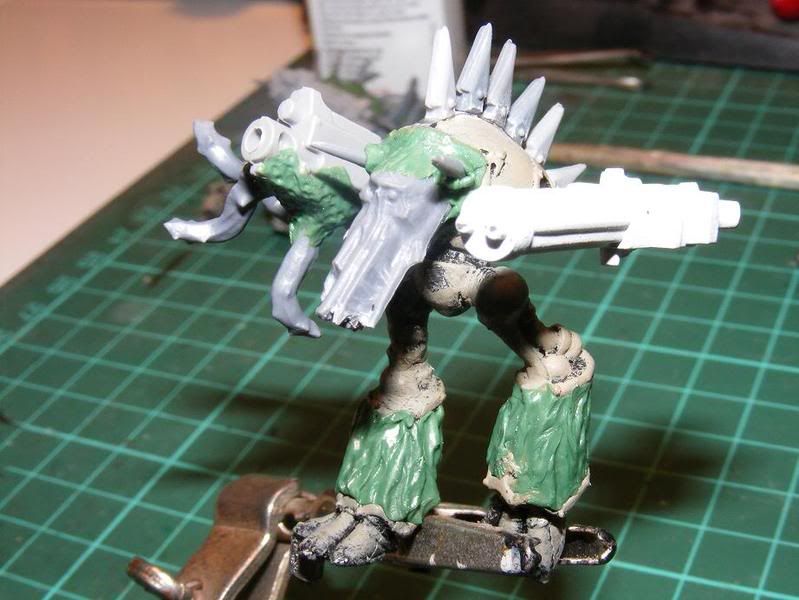 Warhound 2 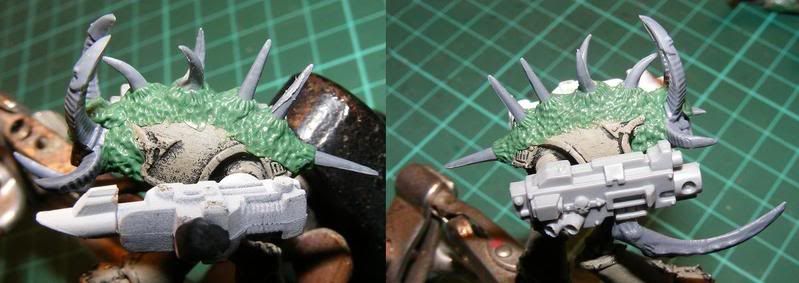 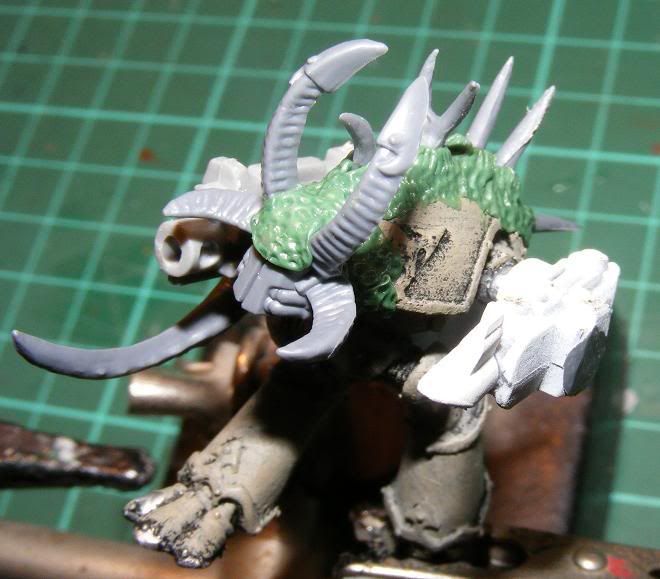 Warhound 3 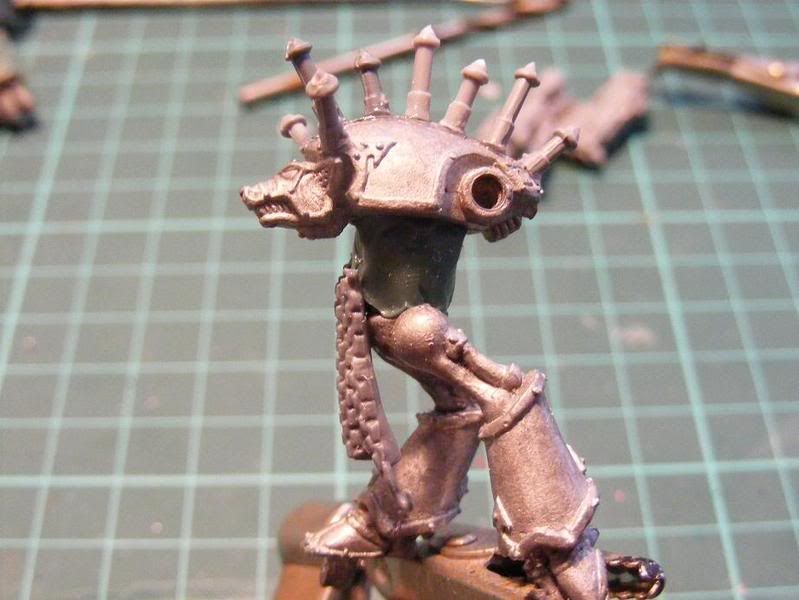 I bought this titan of ebay cheap one time, it was missing averything other than the legs and body so I decided to make it my own by making the middle of it, I decided to make it stand a bit taller as well. To start it i just had to fill the centre up with putty for the next step. |
|
|
|
Post by Cthulhu_gump on Jan 6, 2009 13:16:24 GMT 10
• Continuing in small steps, I did some more putty work on these guys. one of the guns on WH 1 broke off while I was doing some of the conversion work and this led me to expanding the putty to help hold this and the other gun stronger. Heres the pics: Warhound 1  Warhound 2 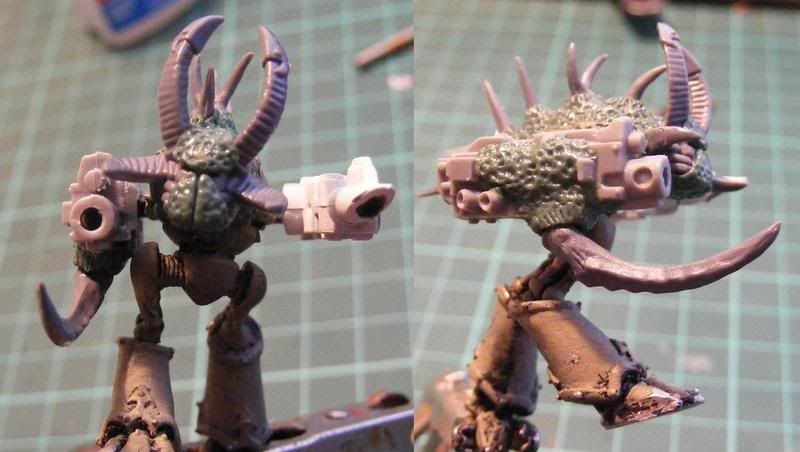 Warhound 3 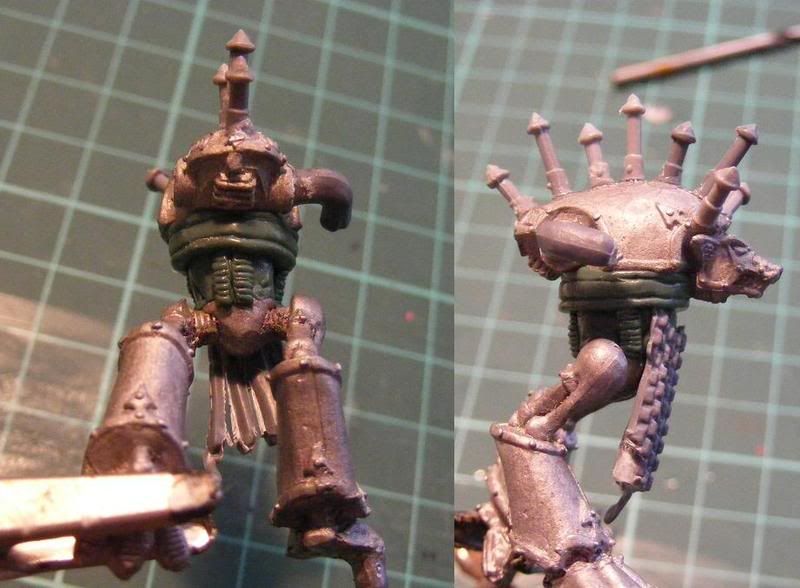 |
|